Last year I had my 30th birthday party. I wanted to make it a little more of a shindig, so I decided to plan a puzzle hunt. And what was the theme? You guessed it, it was the International Space Station. I had never run a puzzle hunt before, so I decided to get some help from my friend Catherio. She was on the team that created the 2015 MIT puzzle hunt, and I knew she’d help me avoid a lot of puzzling pitfalls.
I’ve written out the full instructions of the puzzle hunt here so that anyone who wants to reproduce the experience can do so. But I also want to give the reader something of a chance at participating in the puzzle themselves, so I’m going to write this post from the perspective of a puzzle-solver, and split it across a few pages to hide the answers. You can pause reading at any time to try to figure out the next step. If you just want to read the instructions to reproduce the puzzle, skip to the last page.
The Hunt
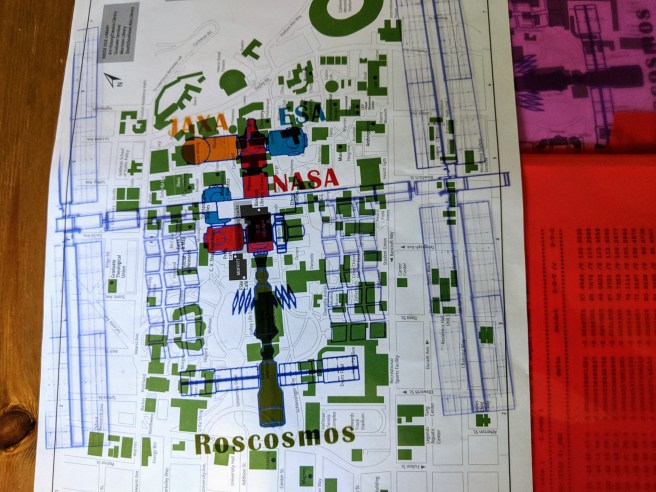
You and your 20 closest friends show up on site, at the entrance to the Doe library on UC Berkeley campus. It’s raining a little bit. You are split into four groups, representing the four space agencies of the ISS: NASA, Roscosmos, ESA, and JAXA. You end up in the ESA group, representing the European Space Agency. The mission director gets everyone’s attention and begins to speak.
“Welcome everyone! We’ve got an important mission to complete today. Unfortunately, it hasn’t been going so well. A routine resupply capsule has been sent up to the ISS. Just as it was docking, a collision occurred that broke up the capsule, sending the payload spinning away. You job now is to survey the area to collect pieces of the capsule, with which you will attempt to recover telemetry data to locate the payload.”
They hand out four binders, one to each group. The binders contain the following:
“This is your mission briefing booklet. The ISS overlay shows the relevant search areas; capsule debris will not be far outside the colored areas. There will be no debris inside campus buildings. You’ve been assigned to different regions of the ISS depending on which space agency sent you up. The map in your mission guide shows you the bounds of your region. This division helps you efficiently parallelize your search; the overall mission is best completed as a team.
“Your mission packets contains other useful information. You have internet access on the ISS. Catherio and I are mission control; if you have any questions, message us on Messenger or some other platform. You’re encouraged to send me messages about your progress or struggles, so I can help get you more resources.”
With this, you are released.
If you’d like to inspect the mission booklet, take a closer look at the documents linked above. To go outside, go to the next section.
Recently one of my friends excitedly told me, Alex, my cousin makes elaborate gingerbread houses every year, and guess what he’s making this year? The International Space Station! That idea instantly struck me as a tempting project. Over the last week, I finally got around to it.
First, like any normal human, I googled it to see what had been done before. I found twoexamples on google images.
Now, both of these are wonderful, but if you know me, then you’ll know that one thing I really appreciate is accuracy. So I decided that I’d do my best to make my model to scale.
The next step was to ask myself, what are the main, essential components of the station? I’d say there are three; the pressurized modules, the solar arrays, and the truss that connects them all. The solar arrays are easy, just flat rectangle. The truss is a long beam with a trapezoidal cross section. Challenging, but could be done with four long thin slices of gingerbread. Lastly, there’re the pressurized modules.
This part of the station gets the most attention by far, since it’s where the people are. It is the core of the station, both structurally and in terms of purpose. The rest of it feels like infrastructure, like all the pipes in your basement (although there are a number of scientific experiments attached to the truss). It was also least obvious how to model this part. It’s mostly a bunch of cylinders. I can imagine making a cylinder of gingerbread, but the radius would have to be awfully big. I realized that this feature would probably dictate the scale of the rest of the model, so I decided to do a circuit through the local grocery store to take an inventory of what cylindrical desserts would be appropriate. There were lots of possibilities, but nothing was particularly satisfying. I was originally hoping to use Little Debbie’s swiss rolls, but those proved both hard to find, and a little too big.
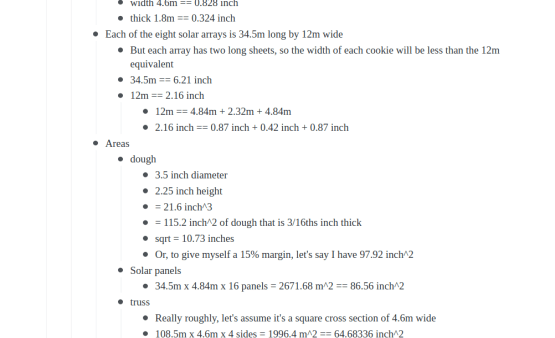
I took some time to figure out what a given module radius would imply about the physical sizes about the rest of the model. It was tempting to make a meter-long station, but I didn’t think I had the gingerbread or table space for it. I eventually decided that a 0.75 inch diameter for the modules would just about max out the pre-made dough I had bought, while making everything else workable. After one more store visit, I found these Waffeletten desserts.
This gave me a scaling factor of 0.18 inches per meter, or 1:219. (For comparison, this popular LEGO Saturn V kit is 1:110.)
I decided then that it was worth running a quick series of experiments in baking the dough. Did I mention I’ve never made a gingerbread house before? I later realized that I’d also never made a model of the ISS before. So this was a nice first.
Anyway, I took a scoop of the dough, put it on some parchment paper, and drew a circle around it with a pencil to see how much it would expand. I also wrapped some dough around a metal chopstick, just to see if that would make a nice crisp cylinder of dough. It did not.
I also used this opportunity to try cutting the dough, before baking, after baking, and after it had time to cool down. It was feasible to cut in all cases, as long as I was a bit careful with the edges. I also found that the dough expanded by 25%. Later I would learn that this did not replicate with larger amounts. Science is hard.
After baking and cutting all sixteen solar panels, I began to seriously question whether I could practically make the truss out of gingerbread. Some parts of it would be thinner, it would need to be glued together with icing, and I was concerned about running out of dough. Another friend mentioned that I could use Toblerone chocolate bars for it. They turned out to be the perfect size for my chosen scale. I decided to trim the pointy top off all the segments, to bring it closer to the trapezoidal shape.
I was pleased to find that there is edible, metallic paint, readily available off amazon. This gave the station a little pizzazz, making it look more suggestive of the real thing. I opted not to paint all surfaces though, partly because I didn’t know how far the paint would go (it turned out to need two coats) and partly because I still wanted my model to be obviously food.
While making decisions I tried to choose a compromise between three features: an accurate model, something that was in the gingerbread house spirit, and something that cohered as a food pallet. There were candies that would have made some of the detailing easier, but didn’t seem like they would taste good next to gingerbread. The only parts I ended up with that were not edible were the toothpicks, paperclips and paper.
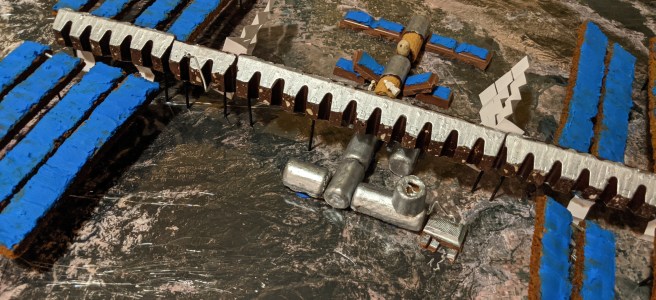
While waiting for things to dry, bake, or cool, I decided to create the mat to display it on. I got a surprising amount of pleasure out of making this part. Originally I just thought I’d use a plain piece of cardboard, and then I realized that it would be easy to make it look like the earth was below the station. I looked around for easy ways to get satellite images of the earth, and screen-shotting google maps turned out to be the easiest way. So I zoomed into the Bay area (where I live), turned on satellite mode, turned of labels, put it in full screen, and took a screen shot. The I panned as far away as I though my margins would handle, and took another screenshot, and so on. Then I cropped the menu stuff from these photos, printed them out, cut the white paper margins off, and aligned them, taped them together, taped the whole thing to the cardboard, and then covered it in plastic wrap.
Here’s the section where I want to brag about the accuracies, because if I was reading this post I would want to know all about it. (After that I’ll talk about the inaccuracies.) First, all the basic sizes are proportional: the length of the truss, the height and shape of the truss, the length and width of the solar panels, the fact that they’re paired up, the spacing between them, the spacing between the pairs, their distance from and along the truss, the diameter and length of the pressurized modules, their relative locations, the fact that Zarya has its solar panels folded up to make way for the thermal radiators, the width, length and number of panels of the thermal radiators. I’m also pleased to have included the existence of the Poisk docking module, the Bigelow Expandable Activity Module, the Canadarm, the Kibo Exposed Facility, and the Kibo Remote Manipulator System. I set some of the solar arrays at an angle, because in pictures of the station they never seem to all be at the same angle, and I angled the thermal radiators perpendicularly. Finally, the mat depicts the SF Bay area and a hundred miles east of it; relative to this, the ISS is positioned going in the right cardinal direction (but at not quite the right angle).
Okay, now for the inaccuracies. The Quest Airlock is completely missing, because honestly it’s just such a weird shape that I didn’t know what to do. The most egregious depiction is the truss. I treated it like a homogeneous linear shape, whereas in reality its made of as many distinct segments as the pressurized section. The parts that hold the solar arrays aren’t even trapezoidal. None of the intricate machinery is represented (except the Canadarm). Next are the Russian components Zarya and Zvezda. I gave these a try, but they’re also a really irregular shape, so I only got a bit of it. They should also be painted white, but I didn’t want to buy two bottles of edible paint.
There are a number of components that aren’t present simply because they would be located below the plane that I rested the model on. These are the Pirs and Rassvet Russian modules (which are smaller than most of the others, but still notable), the cupola, and the other four panels of each of the smaller thermal radiator arrays that point downward. There are some missing external platforms and experiments like the Alpha Magnetic Spectrometer. There are no docked spacecraft, resupply capsules, or adapters.
Overall this project was really fun! I was surprised by how much I enjoyed trying to replicate features of the station. I was also surprised at how much time things took, and how many decision points there were that mattered. For example, I painted the toothpicks black as an afterthought, but now I realize that that made a big difference in how it looks. I’m very happy with the result, and I’m now more motivated to make more ISS models!
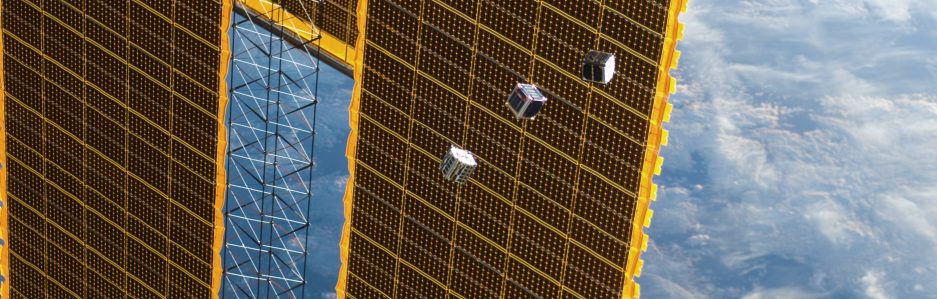
On May 23rd, 2018, I had an idea. I was having dinner with a friend. That night, the International Space Station (ISS) was going to pass almost directly overhead just after sunset; the perfect conditions under which to view it. What’s more, a Cygnus resupply spacecraft had recently launched, and had approached the station close enough to be seen next to it as a separate, dimmer point of light. For whatever reason, over dinner the thought occurred to me; what if we built a replica of the ISS, so that we could explore it? We could wander around inside, taking all the twists and turns, looking inside all the different cabinets and storage areas. We could poke around at the scientific apparatuses, see how the hatches worked, crawl inside the attached capsules, look down into the cupola. Then we could go outside and see the massive solar panels, the robotic Canadarm, and explore the equipment on the huge truss that holds it all together. It would be amazing! Who wouldn’t love that?
My friend was immediately skeptical. Isn’t the ISS huge? Wasn’t it insanely expensive to build?
To these challenges, my mind automatically generated solutions using the strategies I had absorbed from being a software developer; so-called “agile” or “lean” methodologies. (I’ll use lowercase here, since I’m not referring to their official definitions, but instead to the general principles that have spread throughout the profession via habit and hearsay.) In agile development there’s a term called MVP, which stands for Minimum Viable Product. If your future is highly uncertain, with limited funding and a small team, then instead of starting to build the best product you can think of in its mature form, consider the minimum-effort version of the product that still provides the fundamental functionality. If you get that far, start showing it to people right away, so that you can incorporate their feedback as soon as possible. Sometimes the feedback will be things you expected because you know it’s the minimal version: maybe people will complain that it doesn’t have many features, or that it looks ugly. But sometimes reality will surprise you, and people won’t care about how it looks, and instead they’ll all want a slightly different version of the product than what you were thinking of. Since you haven’t invested a lot of resources into a specific design, it’s easier to make iterative improvements.
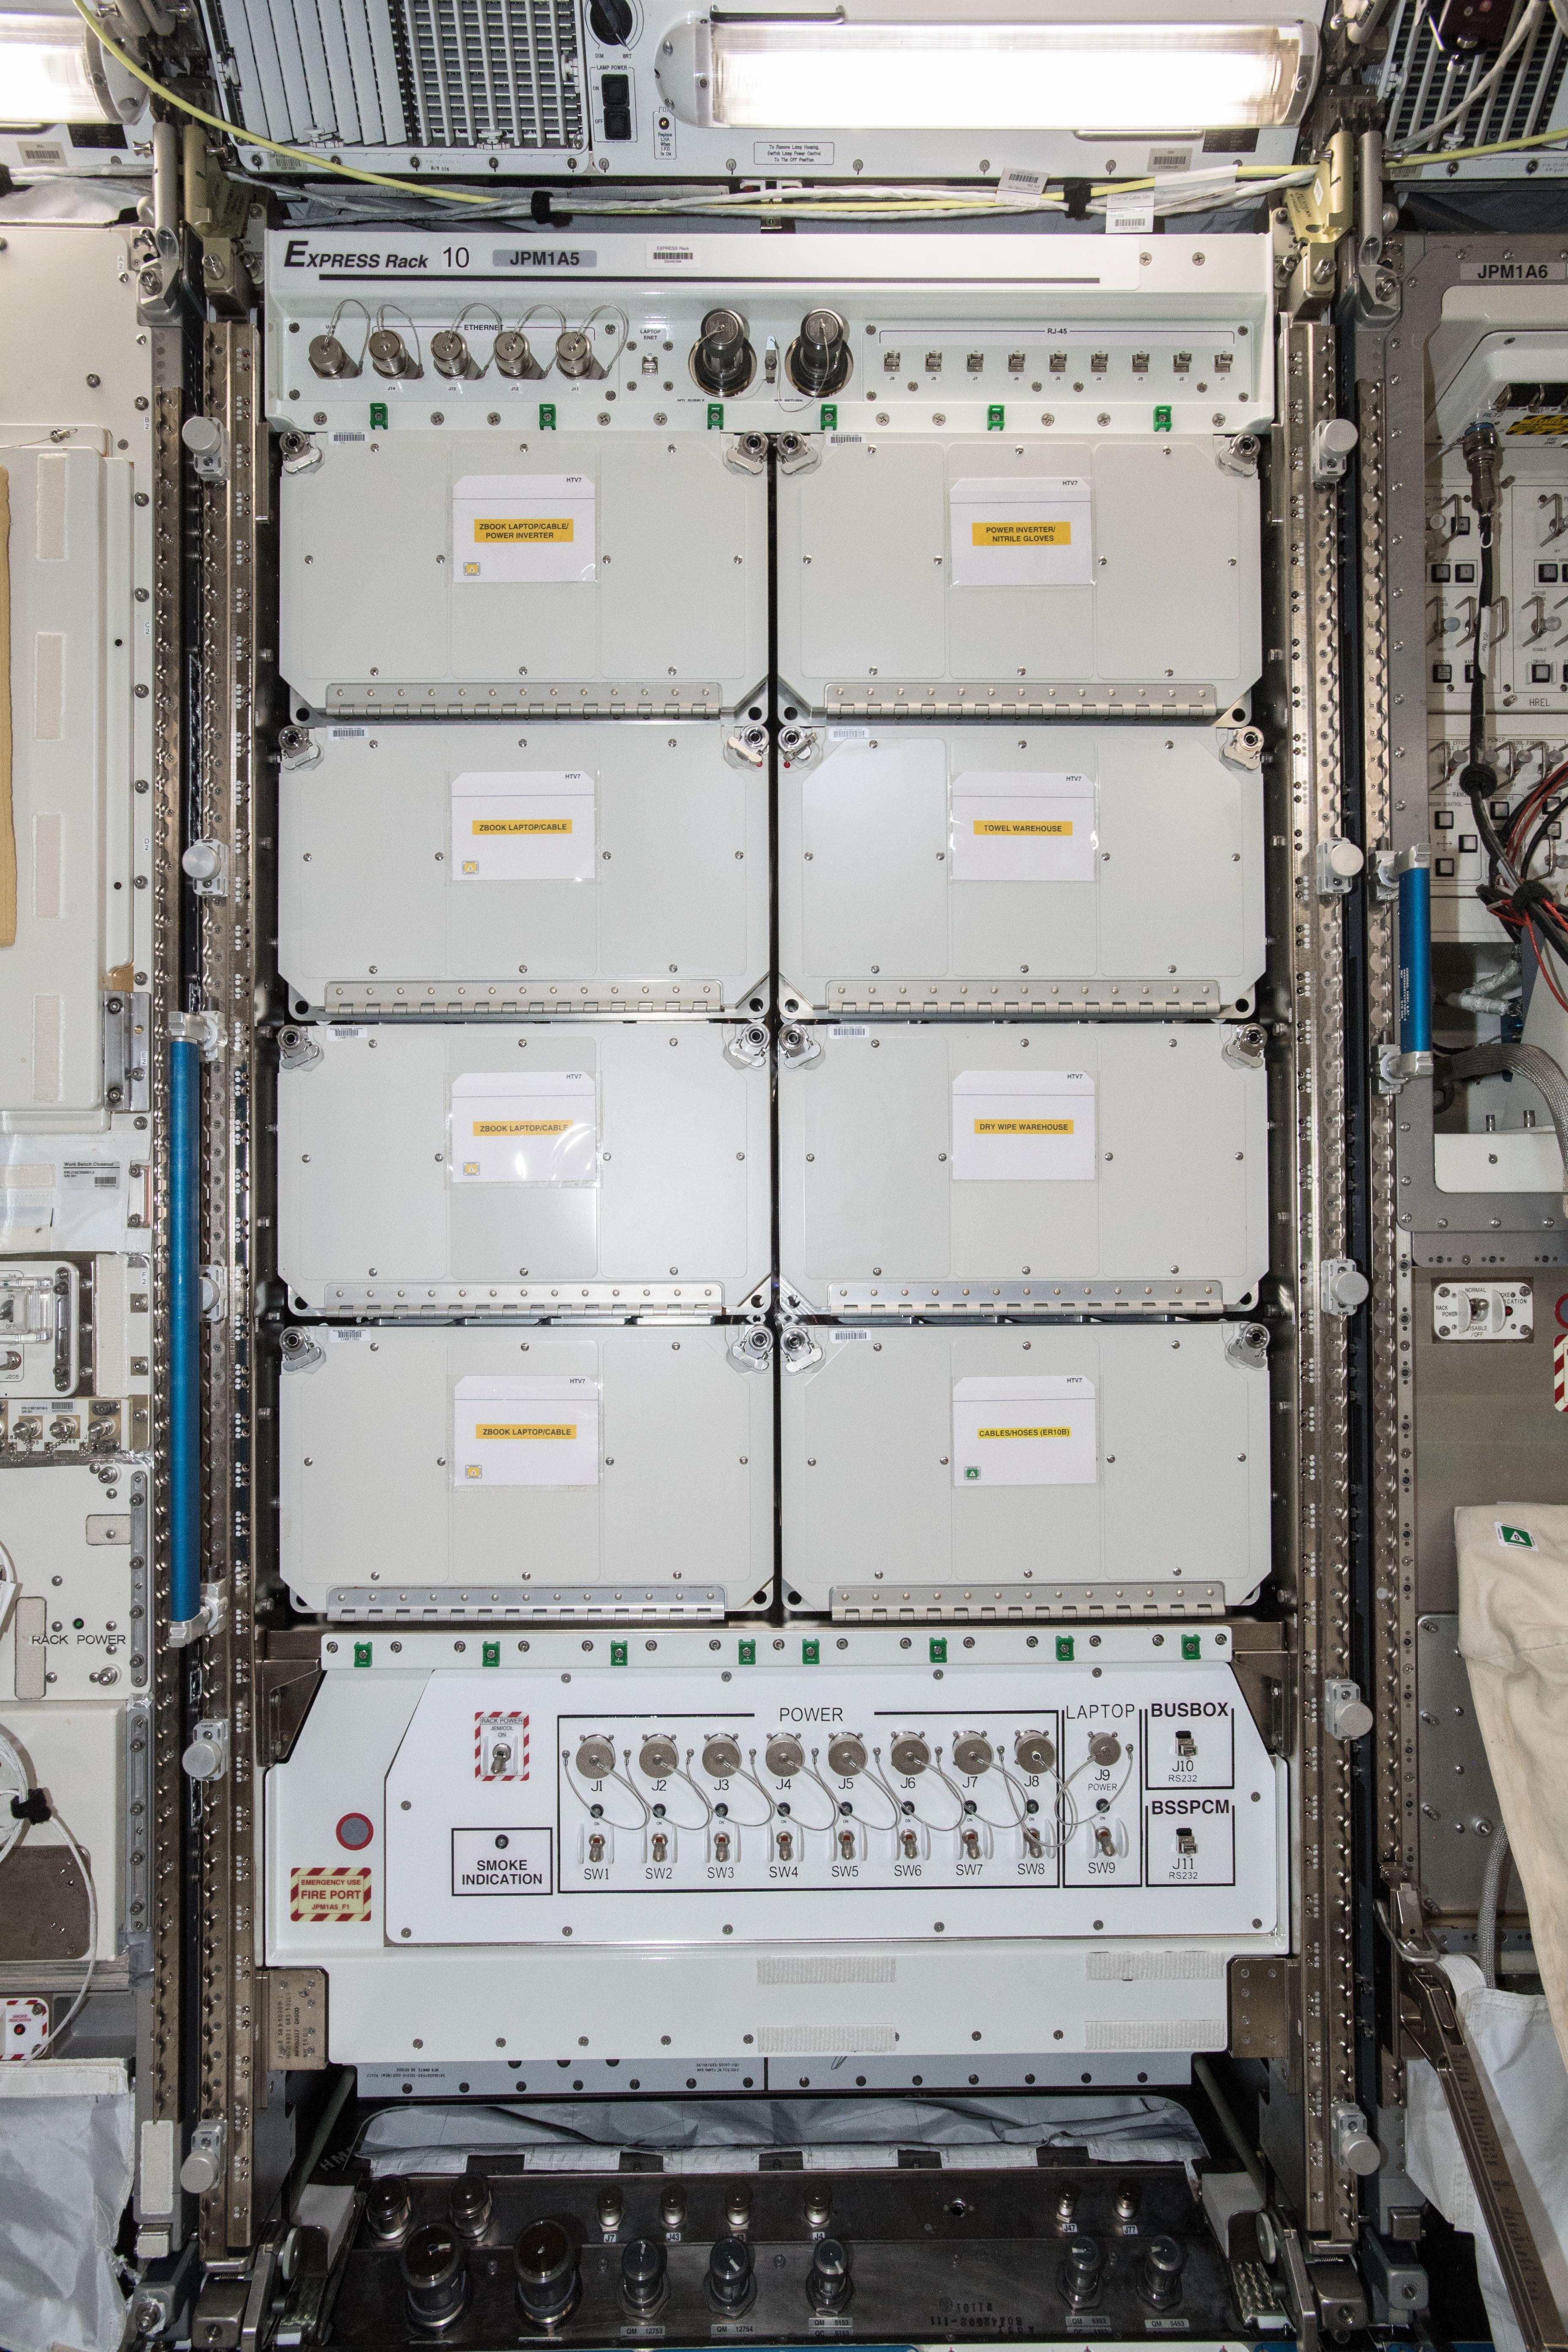
One of the many racks of equipment on the ISS.
So I asked myself, what is the minimum viable version of this ISS replica? We could get a bunch of plywood, nail it together in the shape of the internal corridors of the ISS, get images of all of the panels, print them on life-sized posters, and hang up the posters on the plywood. This would get you a sense of the size and structure of the whole station for, what, a few hundred bucks?
My friend was not impressed.
Okay, okay, I said, that’s not thrilling, but hear me out. That was literally my first thought. We could trivially improve this. We could go to a junkyard and get a lot of the stuff that’s inside the station — ethernet cables, cameras, Thinkpads — and velcro it all over the walls and ceiling. We could go to the Container Store and buy lots of those fabric bags that astronauts use to store things, remove one of the plywood panels, and fill the gap with a bunch of the “zero-g stowage”. We could replace some of the panels with tablets, and write interactive apps about the station. I proposed that through a series of similar modifications, we could create a pretty cool playground environment, and still not spend more than a couple thousand.
There’s a lot of stuff in there.
It’s not trash, it’s “zero-g stowage”.
We talked about a lot more tangential ideas (“Would NASA give us funding?”, “We could take it to Burning man!“), and eventually the conversation moved on.
Later that night, we got up on the roof, ready with binoculars. The ISS appeared on the horizon, and we tracked it as it approached the zenith. Eventually it shot overhead, bright as I’ve ever seen it. We did our best at hand tracking it with the binoculars, but for whatever reason, we weren’t able to find the trailing Cygnus capsule.
The Real MVP
Since then, I’ve done a lot more thinking and research, and I’ve entirely changed my idea of what the MVP should be. Though the plywood & posters version would be fun to walk through, it would be better to have something that could more plausibly generate self-sustaining revenue. And while you can go fairly far with upgrading the plywood & posters, it’s hard to see a smooth transition between that and a realistic replica of the entire station, inside and out; at some point you just have to scrap the whole thing and start over.
I also clarified my goals, by introspecting on what got me so excited about the idea;
1. provide a realistic, immersive experience of the station
2. use it as a platform for STEM education via physically interactive exhibits.
My eventual vision was the station as a science museum. Instead of just being a playground, the internals would all be designed as exhibits that taught you things about how the ISS worked, the environment of space, and the science experiments that are continuously performed inside the station. From my cursory research, it seems like museums typically get built all at once; some rich person or organization decides they want a museum, and that’s that. I could attempt to petition rich people, but this is not a particularly hopeful strategy. Instead, I decided to start with an MVP, something I knew I could build on my own, and something which, if my idea is good and I adapt to the lessons I learn, will naturally lead me to the next stage. My eventual MVP plan arose from discovering the station’s greatest engineering strength; a double-layer of modularity.
Modularity from the outside
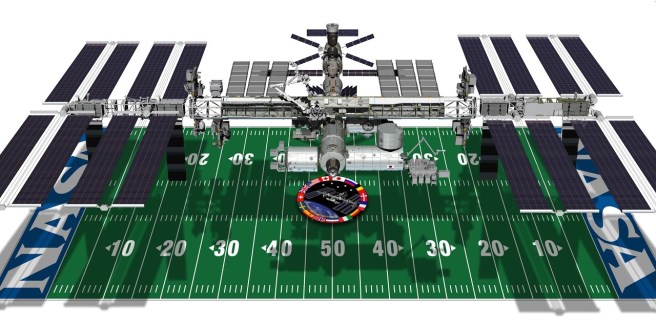
The ISS is about the size of a football field. But all this really means is that it’s about as long and as wide. It is dramatically smaller in volume than, for example, a warehouse the size of a football field. If you fold up all those solar panels, detach the truss, and lay all the pieces next to each other, I reckon they could all fit inside the 15 yard line.How did this gangly structure get into space in the first place? The ISS was taken into orbit almost entirely by NASA’s fleet of space shuttles. Because the space shuttle payload bay is only so big, the ISS had to be designed as many separately functional modules, and then built, launched and assembled together one at a time.
The Space Shuttle orbiter Atlantis deploying the Destiny module of the ISS on mission STS-98
Given this, instead of making a replica of the “whole” station out of shoddy materials, the new idea for an MVP is to build only one module, and make it look fairly realistic from the inside and outside. It still has the property of being an immersive, interactive science exhibit. People will be able to approach a big cool space-looking thing, walk inside of it, and play with dozens of science exhibits. It’s the kind of thing that could travel around to museums, schools or conventions. It’s a relatively practical goal to aim for, and if I get to this checkpoint then I’ll have a better shot at getting more resources to continue, and I’ll have more experience to know how to best move forward. The amount of revenue it can generate roughly scales with its size, providing a sustainable path forward.
A NASA diagram showing all the separable components of the ISS.
Modularity from the inside
Great, so now I have a much more attainable goal, and I didn’t have to give up any of the vision. Now the big question is, which module do I build first? After a long series of reasoning that I’ll detail in a later post, I decided on the module that is officially known as Destiny, but which the astronauts called the US Laboratory, or just “the lab”.
Destiny, along with most of the other pressurized modules, has a very simple architecture. It is a tube whose cross-section is a circle on the outside and a square on the inside. The square provides the equivalent of a floor, ceiling, and two walls. This gives four separate volumes of equal size and shape, one for each side of the square. Finally, the tube is sliced up lengthwise in slices of equal width. These volumes end up being the size of a large wardrobe, and are filled by what is called an International Standard Payload Rack (ISPR). They hold science equipment, electronics, life support, and even the astronaut bunks.
A NASA schematic of a typical ISS module, showing the four rack locations.
Thus, all of the internals of these pressurized modules can be regarded in terms of the modular ISPRs. They are the same across all the relevant modules, no matter the orientation or country of origin, and can be physically removed and swapped around by the astronauts on board. This is fantastically useful for the real ISS, and is fortunately very useful for my project as well.
I wouldn’t really want to build a big cylindrical shell of a space module and then have nothing in it; that is not an MVP. On the other hand, if I have a bunch of ISPRs full of awesome science exhibits, those might be marketable even without a space module for them to go in. This also scales down nicely, all the way down to one rack.
A rendering of a single ISPR, specifically the Microgravity Science Glovebox.
Now we have arrived at the third and most practical level of the plan. We design and build a single rack, housing self-contained interactive science exhibits about the ISS. This has relatively little upfront investment, both in terms of money and time. In the process I’ll learn a lot about my ability to build things and design exhibits. One rack is a sensible object to offer museums as a rentable exhibit, or to schools as part of a science curriculum. Along the way I’ll gain information about what resources I have in my social network. I’ll have a physical artifact that can give people an experiential sense of what the museum will eventually look like. Best of all, it works directly toward the final vision; the ISPR that I build might be able to slot right into the full ISS replica, which is more than we could say about plywood & posters.
I kept this idea in the back of my mind for several months, doing incremental research here and there. Then I spent a couple weekends building an ISPR frame. Eventually, I left my job, and a few months later, I decided to go full time on this idea. If you’d like to follow along, subscribe to this blog. And if you have any questions or advice, go ahead and contact me, either here or on twitter.


 How did this gangly structure get into space in the first place? The ISS was taken into orbit almost entirely by NASA’s fleet of space shuttles. Because the space shuttle payload bay is only so big, the ISS had to be designed as many separately functional modules, and then built, launched and assembled together one at a time.


